Building your containers
Tools and materials you will need include the following:
- Claw hammer.
- Level – two feet long.
- Pointed 18″-long 1″ X 2″ stakes.
- Three-pound hammer.
- Long string.
- Materials for making the container sides and ends.
Containers can be made from wood, cinder blocks, concrete, or other long-lasting material. Directions are for wood containers.
 After identifying the location of your containers, level the ground under each container area.
- Place stakes and string to outline the exact container locations.
- On one side, starting 9″ from the end drive 18″-long stakes 9″ into the ground, on the outside of the string, no farther apart than 30″.
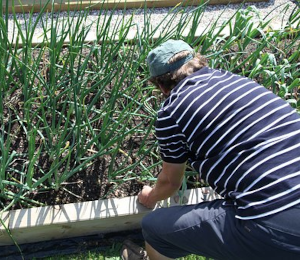
- Place a 1″ X 8″ or 2″ X 8″ board (preferably painted or treated) along the string against the stakes for the length of the container.
- Drive the first stake into the ground until the top is flush with the top edge of the board, then nail the stake to the board.

- Place a level on the top edge of the board and adjust the height until the board is level.
- Adjust other stakes to be flush with the board top, then nail all stakes to the board.
- If your container is longer than your board, nail a 12″-long 1″ X 8″ board on the inside across the joint where two boards meet.
- Nail an 18″ end-piece to each end of the leveled side-board (4’-wide containers can also be used for 2 sets of two rows).
- Drive a stake 9″ into the ground at the center of both end-pieces, level the end-pieces, make stakes flush with the tops, then nail stakes to the end-pieces.
- Place opposite side-board against end-pieces, check level, then drive stakes flush with the side-board top and nail in place.


